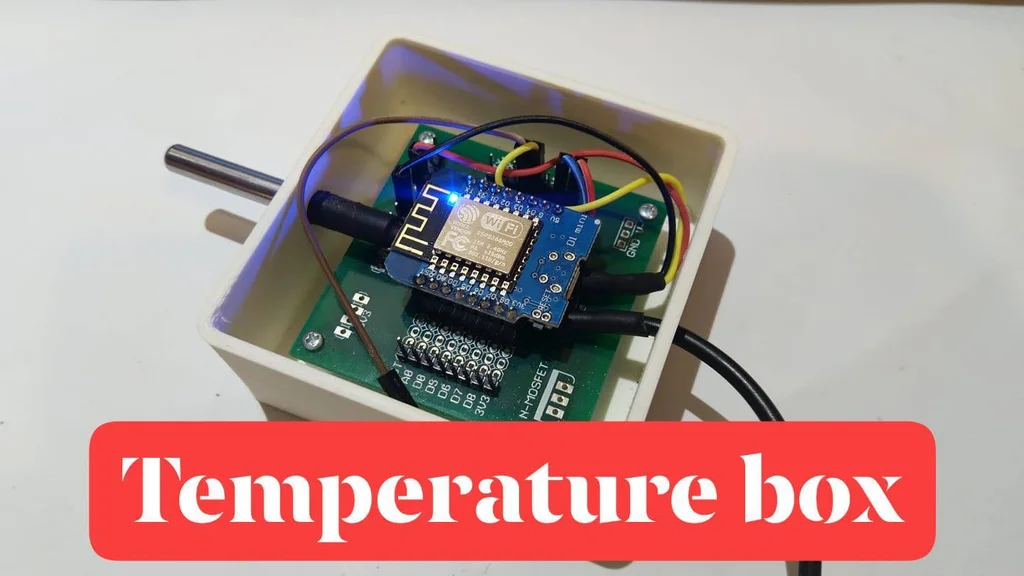
Simple DS18B20 based temperature sensor appliance with open source 3D printable box and prototype PCB.
The box and the prototype PCB is optional, only one ESP8266 based MCU is needed and one DS18B20 temperature sensor. I suggest to you a WEMOS D1 mini, but this example works with an ESP-01 as well.
This example does not explain how to write and upload an Arduino program to the ESP8266 MCU, so be aware of this skill before following me. 🙂
Supplies
- ESP8266 MCU (recommended WEMOS D1 mini)
- DS18B20
- 4.7 kΩ resistor
- some wire
- optionally prototype PCB for WEMOS D1 mini
- optionally 3D printed box
Step 1
It’s easy as pie, check the wiring schematics on the picture:
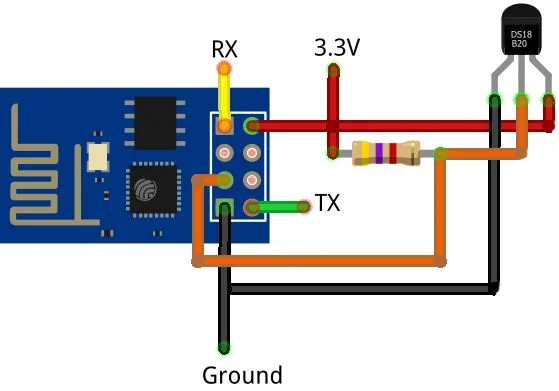
- In case of bare ESP8266 board, connect the RX and TX to your USB-serial device, in case of any board with integrated USB this is not necessary.
- Connect the GND and VCC to the ESP8266 board and to the DS18B20 sensor.
- Connect the resistor between the VCC and the data wire of the DS18B20 sensor.
- Connect the data wire of the DS18B20 sensor to one GPIO of the MCU (for example GPIO 2).
Step 2
You need three additional library:
– OneWire: one-wire
– DallasTemperature: dallas-temperature
– The IoT Guru Integration: the-iot-guru-integration
Step 3
The IoT Guru cloud is a free cloud backend, you can use it to save and show measurements really easy. You need to create a device, a node and a field:
- Name of the device is ESP8266: tutorials/devices
- Name of the node is DS18B20: tutorials/nodes
- Name of the field is temperature: tutorials/fields
To connect with the cloud, you need to gather five identifier:
- userShortId: the short identifier of you
- deviceShortId: the short identifier of your device
- deviceKey: the secret key of your device
- nodeShortId: the short identifier of your device
- fieldName: the name of the field
Step 4
Here is the example code, you need to replace the identifiers to your identifier, replace the SSID and the password to your WiFi credentials and check the GPIO number of the DS18B20 data wire.
#include <OneWire.h>
#include <DallasTemperature.h>

#include <IoTGuru.h>
#include <ESP8266WiFi.h>

const char* ssid      = "iotguru.cloud";
const char* password  = "********";

String userShortId    = "l4jLDUDDVKNNzx4wt2UR6Q";
String deviceShortId  = "uAjbSzf8LvlrofvwYU8R6g";
String deviceKey      = "hacfIjPn6KbBf2md8nxNeg";
IoTGuru iotGuru = IoTGuru(userShortId, deviceShortId, deviceKey);

String nodeKey        = "tGib1WSRvEGJ98rQYU8R6g";
String fieldName      = "temperature";

#define ONE_WIRE_BUS 2
OneWire oneWire(ONE_WIRE_BUS);
DallasTemperature sensors(&oneWire);

void setup(void)
{
    Serial.begin(115200);
    delay(10);

    WiFi.begin(ssid, password);
    while (WiFi.status() != WL_CONNECTED) {
        delay(50);
        Serial.print(".");
    }
    Serial.println("");

    iotGuru.setCheckDuration(60000);
    iotGuru.setDebugPrinter(&Serial);

    sensors.begin();
}

void loop(void)
{
    iotGuru.check();
    sensors.requestTemperatures();

    float measuredValue = sensors.getTempCByIndex(0);
    Serial.println("The first sensor temperature: " + String(measuredValue) + " °C");

    iotGuru.sendHttpValue(nodeKey, fieldName, measuredValue);

    delay(30000);
}
Step 5
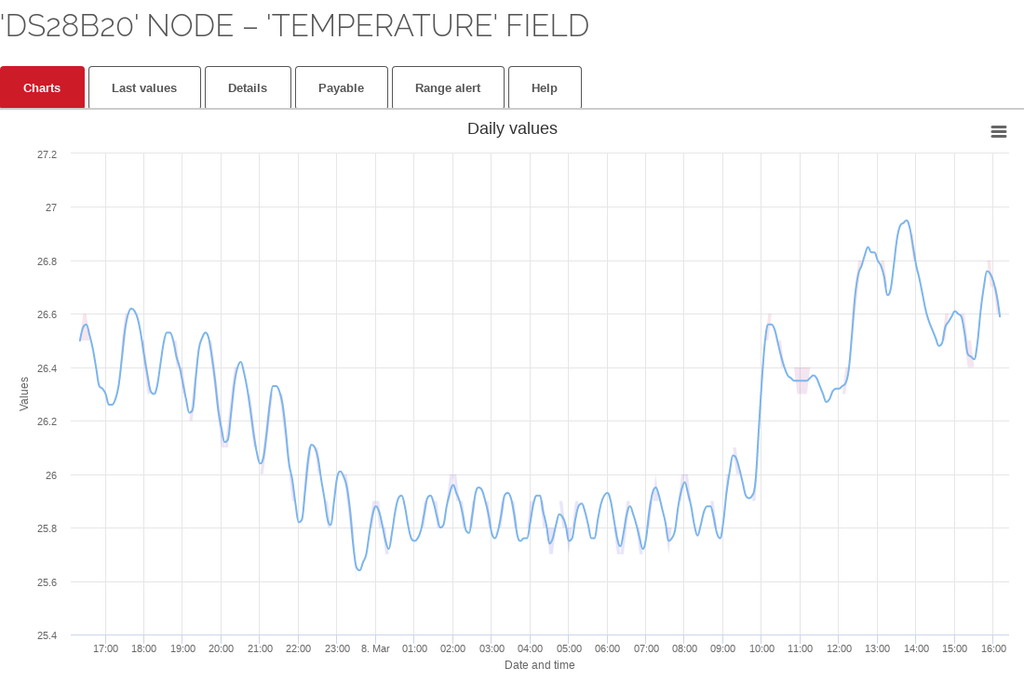
Upload the compiled firmware to your device. If everything is fine, your thermometer box will send the sensor measurements to the cloud and you’ll see such nice graphs over time if enough measurements have accumulated.
More information and examples: