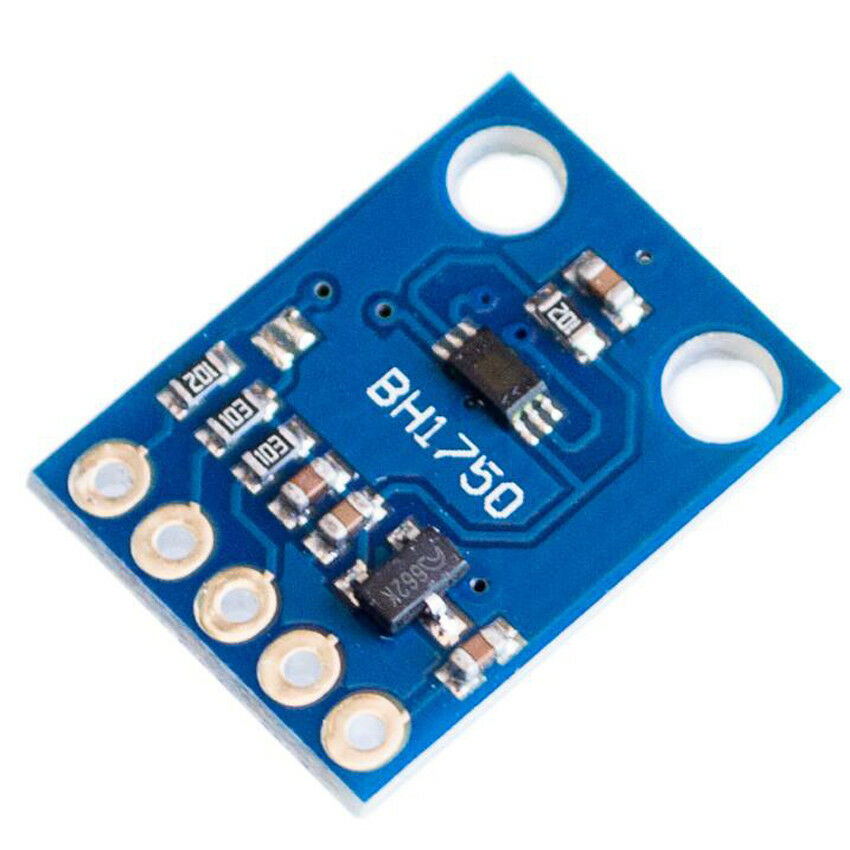
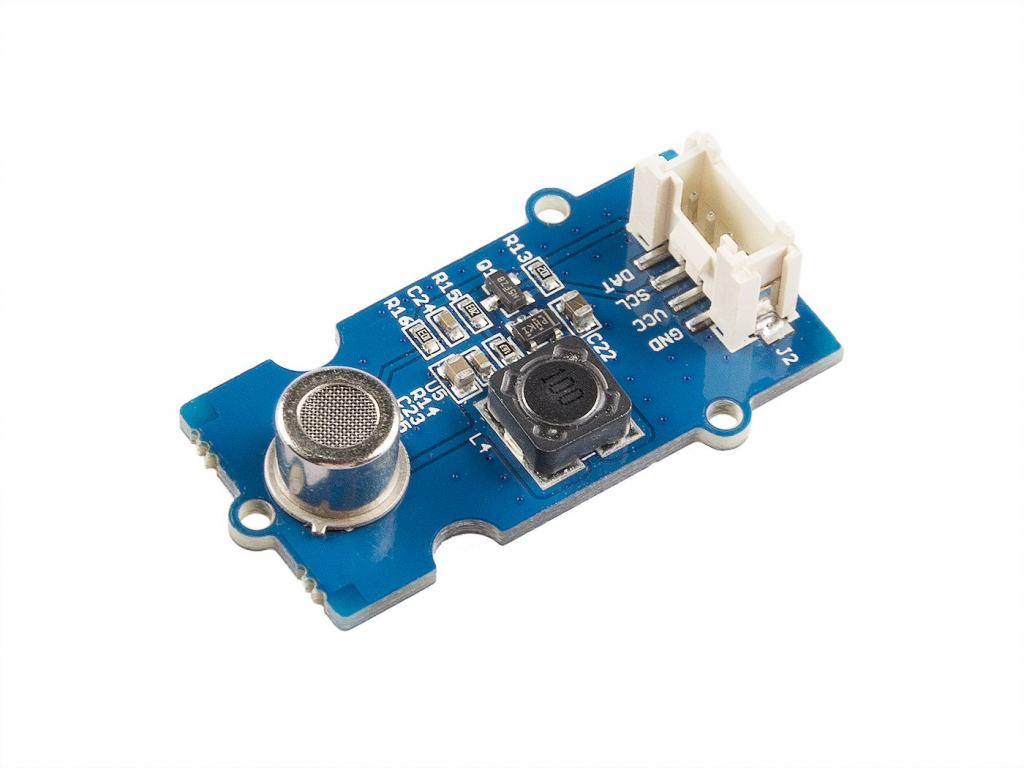
Categories
Hardware

WEMOS D1 mini

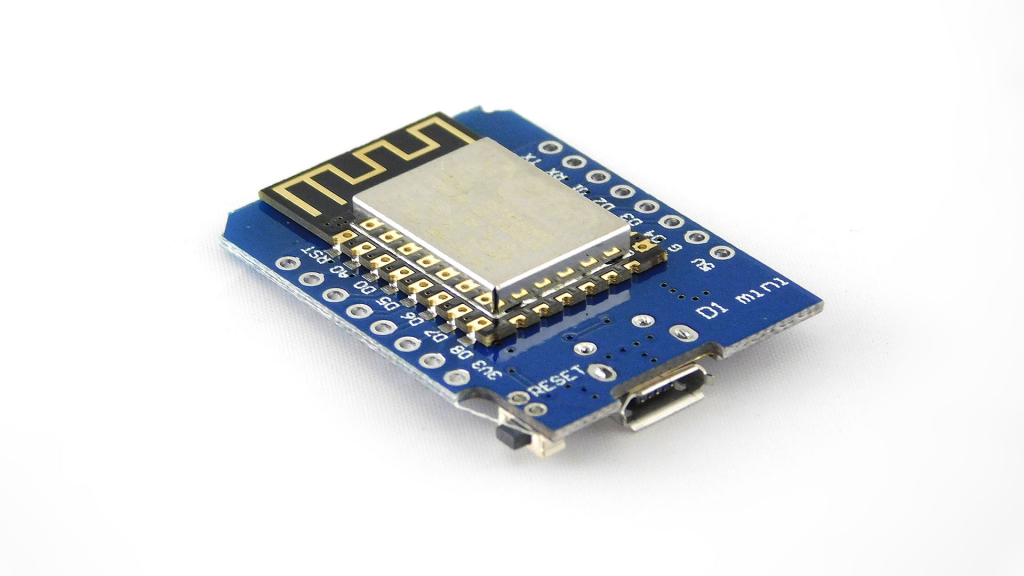
WEMOS D1 module it’s a small board with ESP8266-12F. On board there is also USB-UART converter (popular CH340). Because of that, all you need to start programming is simple USB cable.

  • Embeded ESP8266-12F with PCB antena
  • Supply voltage: 3.3V (or 5V via USB)
  • 9 GPIO – PWM / I2C / SPI / 1-Wire
  • Max current on I/O pins: 12mA
  • Recommended current on I/O pins: 6mA
  • USB-UART converter – CH340
  • ADC – 10-bit
  • 16 pins in 2,54mm raster – breadboard compatible
  • micro USB B
  • Size: 34 x 25mm
  • LED connected to GPIO2 (D4)

More information:
https://nettigo.eu/products/wemos-d1-mini-v2-wifi-module

Categories
Hardware

UV sensor

Wide spectral range from 200nm to 400nm, stable and good sensitivity, compact design and low power consumption.

More information:
https://www.seeedstudio.com/Grove-UV-Sensor.html

Categories
Hardware

OLED Display 0.96″

A monochrome(white) 128×64 pixels passive display matrix module with Grove I2C Interface.

  • 3.3V/5V compatible
  • Changeable I2C address
  • Low power consumption
  • Monochrome(white) 128×64 pixels
  • High contrast, high brightness
  • Wide operating temperature range: -40℃ ~ +85 ℃

More information:
https://www.seeedstudio.com/Grove-OLED-Display-0-96-SSD1315-p-4294.html

Categories
Hardware

Red Quad Alphanumeric Display

This module is a 4 digit alphanumeric display with high brightness and red backlight, each digit is consists of a 14-segment digital tube

  • Can display all letters and numbers
  • Ultra-high brightness:30mcd
  • Grove I2C, only takes two IO pins
  • Onboard drivers, easy to use
  • Cathode display

More information:
https://www.seeedstudio.com/Grove-0-54-Red-Quad-Alphanumeric-Display-p-4032.html

Categories
Hardware

Alcohol sensor

Alcohol Sensor is a complete alcohol sensor module for Arduino, it is built with MQ303A semiconductor alcohol sensor.

More information:
https://www.seeedstudio.com/Grove-Alcohol-Sensor.html

Categories
Hardware

Water level sensor

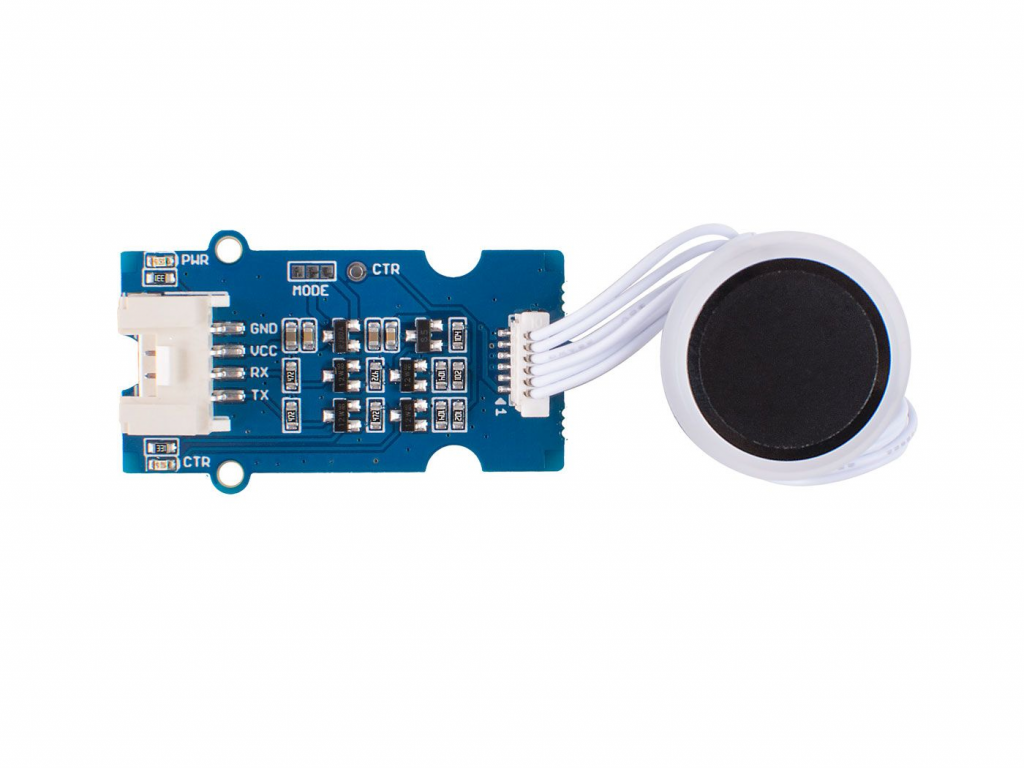
The Grove Water Level Sensor is a very accurate sensor that can be helpful in water level sensing applications. It is completely waterproof and uses capacitive pads to detect water levels up to 10cm.

  • Easy to use (Use Grove Connector without soldering)
  • Based on capacitive sensing
  • Waterproof
  • Conformal Coating
  • Corrosion Resistant
  • Detect up to 10cm water levels
  • I2C Interface

More information:
https://www.seeedstudio.com/Grove-Water-Level-Sensor-10CM-p-4443.html

Categories
Hardware

Capacitive fingerprint scanner

The Capacitive Fingerprint Scanner is a small size, low power consumption, high-reliability Arduino fingerprint sensor.

  • Built-in 2KByte storage: support up to 100 fingerprints
  • Powerful self-learning function: the more you use, the more accurate the recognition
  • Selectable security level
  • Small size, low power consumption,10uA for standby mode

More information:
https://www.seeedstudio.com/Grove-Capacitive-Fingerprint-Scanner-p-4363.html

Categories
Tutorial

Remote relay switch

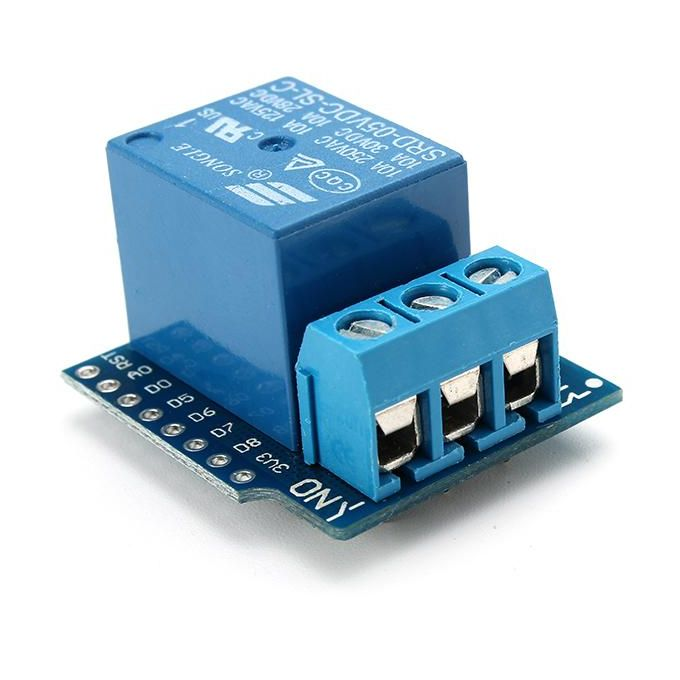
We are creating a simple system that can switch a relay from everywhere, based on a WEMOS D1 mini and a relay shield.

With cloud integration the switch of the relay controlled by the IoT Guru Cloud library, where we will use a simple HTML & JavaScript page with two buttons.

Supplies

WEMOS D1 mini or any other ESP based MCU

WEMOS relay shield or relay
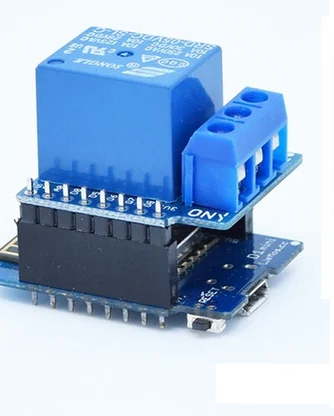
Step 1

Solder and stack the WEMOS D1 mini and the relay shield together like this:

Alternatively you can use any ESP based MCU and relay.

Step 2

If you don’t have already, you need to create a device, a node and a field in our cloud, follow this articles:

If you haven’t installed it yet, install our official Arduino library:

Step 3

To connect with our cloud, you need to gather six identifier:

  • userShortId: the short identifier of you
  • deviceShortId: the short identifier of your device
  • deviceKey: the secret key of your device
  • nodeShortId: the short identifier of your node
  • nodeKey: the secret key of your node
  • fieldName: the name of the field

Step 4

Create a new Arduino sketch, copy-paste the following code and replace the ssid, the password, the userShortId, the deviceShortId, the deviceKey , the nodeShortId and the fieldName with your Wifi credentials and with your gathered values:

#include <IoTGuru.h>

#ifdef ESP8266
  #include <ESP8266WiFi.h>
#endif
#ifdef ESP32
  #include <WiFi.h>
#endif

#define RELAY_PIN         5

/**
 * WiFi parameters.
 */
const char* ssid        = "ssid";
const char* password    = "password";
WiFiClient client;

/**
 * Initialize the connection with the cloud.
 */
String userShortId      = "xxxxxxxxxxxxxxxxxxxxxx";
String deviceShortId    = "yyyyyyyyyyyyyyyyyyyyyy";
String deviceKey        = "zzzzzzzzzzzzzzzzzzzzzz";
IoTGuru iotGuru         = IoTGuru(userShortId, deviceShortId, deviceKey);

/**
 * Constants of the MQTT channel check.
 */
String nodeShortId      = "nnnnnnnnnnnnnnnnnnnnnn";
String fieldName        = "relay";

void setup() {
    Serial.begin(115200);
    delay(10);

    WiFi.begin(ssid, password);
    while (WiFi.status() != WL_CONNECTED) {
        delay(50);
        Serial.print(".");
    }
    Serial.println("");

    /**
     * Set the relay pin.
     */
    pinMode(RELAY_PIN, OUTPUT);

    iotGuru.setCallback(&callback);
    iotGuru.setDebugPrinter(&Serial);
    iotGuru.setNetworkClient(&client);
}

void loop() {
    iotGuru.loop();
    delay(10);
}

void callback(const char* cbNodeShortId, const char* cbFieldName, const char* message) {
    Serial.print(cbNodeShortId);Serial.print(" - ");Serial.print(cbFieldName);Serial.print(": ");Serial.println(message);

    if (strcmp(cbNodeShortId, nodeShortId.c_str()) == 0) {
        if (strcmp(cbFieldName, fieldName.c_str()) == 0) {
            if (strcmp(message, "0") == 0) {
                Serial.println("Switch relay to LOW");
                digitalWrite(RELAY_PIN, LOW);
            } else {
                Serial.println("Switch relay to HIGH");
                digitalWrite(RELAY_PIN, HIGH);
            }
        }
    }
}

Step 5

Plug your WEMOS D1 mini to your computer with an USB cable, compile the code you’ve edited above and upload it to your WEMOS D1 mini. Check the Serial console about the connection messages.

Step 6

Create a HTML page on your computer or your webserver and copy-paste the following snippet into the body tag; replace the nnn..nnn with your nodeKey value:

<center>
  <button id="mqttOn" name="mqttOn" value="ON">ON</button>
  <button id="mqttOff" name="mqttOff" value="OFF">OFF</button>
  <hr/>
</center>

<script src="https://cdnjs.cloudflare.com/ajax/libs/jquery/3.4.1/jquery.min.js"></script>

<script>
    $("#mqttOn").click(function(){
        $.ajax({url: "https://api.iotguru.live/mqtt/send/nnnnnnnnnnnnnnnnnnnnnn/relay/1"});
    });
    $("#mqttOff").click(function(){
        $.ajax({url: "https://api.iotguru.live/mqtt/send/nnnnnnnnnnnnnnnnnnnnnn/relay/0"});
    });
</script>

If you have reached this point, pressing the ON and OFF buttons will turn the relay on and off.

Categories
Hardware

Doppler Radar Motion Sensor

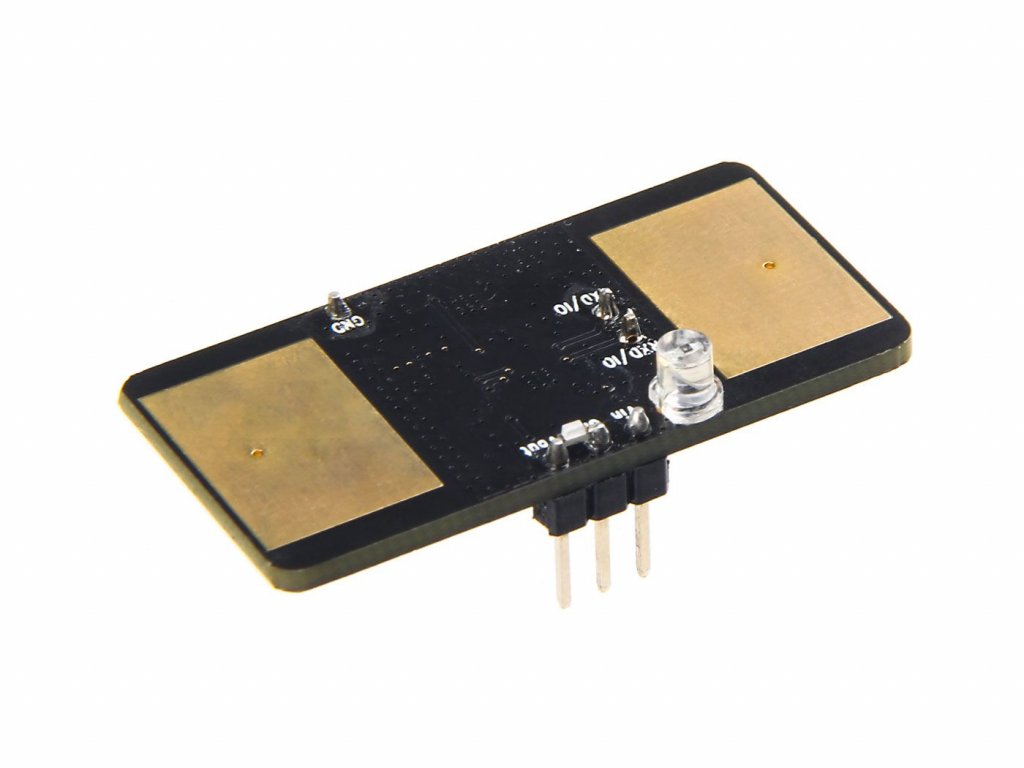
MW0582TR11 – 5.8GHz Microwave Doppler Radar Motion Sensor is a microwave Doppler radar that has a frequency of 5.8GHz. This microwave sensor has high sensitivity and precision and it can be used in some industrial and light controlling applications. 

  • Power supply: 5V
  • Current consumption: 40~70mA
  • Radiated Power: -30~7dBm(Adjustable by software)
  • Frequency Setting: 5.725~5.875GHz(Adjustable by software)
  • Receive Sensitivity: -60dBm
  • Dimension: 39×22.5×1(mm)

More information:
https://www.seeedstudio.com/MW0581TR11-5-8GHz-Microwave-Doppler-Radar-Motion-Sensor-p-4366.html

Categories
Hardware

PIR Motion Sensor

PIR(Passive Infrared Detection)are used to detect motion of human movement.

  • Long-range
  • Wide-angle
  • Low consumption
  • DC 3.0-5.5V power supplier

More information:
https://www.seeedstudio.com/PIR-Motion-Sensor-Large-Lens-version.html